
YELLOW STUFF IV ™INSTRUCTIONS
Yellow Stuff IV™Intructions
If unfamiliar with injection gun assembly, click here.
With the ‘gun’ ready to go, proceed with the following steps:
- Visually inspect the ear with an otoscope and place an appropriately sized cotton or foam block (we recommend hand tied cotton blocks).
- After insertion of the block, visually reinspect to insure proper placment.
- Prior to attaching the mixing tip, bleed the cartridge to insure equal flow from both barrels. This is primarily important with the initial use of a cartridge to align the cartridge plugs, but can be done with each use to insure proper flow.
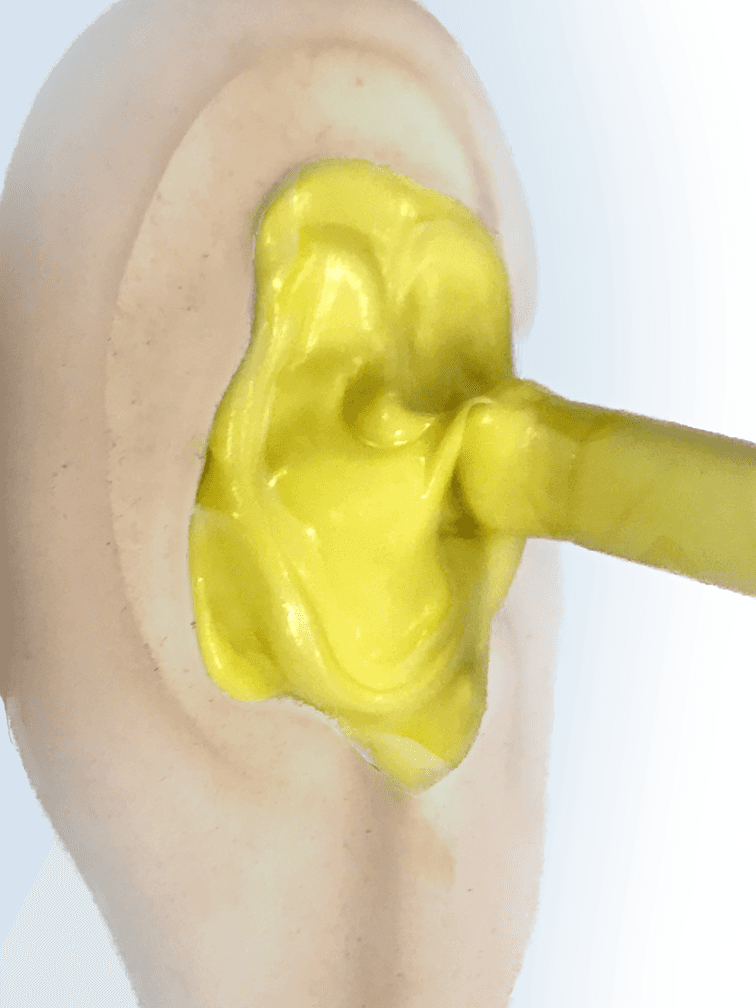
- To begin, place the mixing tip into the canal and begin squeezing the trigger steadily and slowly to reduce the possibility of voids. The flow can be stopped at any time by releasing the trigger. After the trigger is fully retracted, release and begin retracting again while continuing to keep the tip slightly buried in the material.
- Continue until all necessary areas of the ear are filled, making sure to use an upward angle when filling the antihelix area and also making sure the tragus and anti-tragus areas are covered.
- Allow the material to set-up for 5-7 minutes to make sure the full impression has set up and is ready for removal (test by pressing lightly with a fingernail to insure that no mark is left).
- Prior to removing the impression, break the seal areound the ear carefully and completely.
- Hold the impression, twist gently forward while pulling the impression out of the ear.
- Reinspect the ear after the impression is removed.